


How to Clean a Katana?
Every sword must be kept clean, protected, and stored correctly to prevent the blade from rusting and corrosion. And when it comes to cleaning a Japanese Katana with its mirror-like surface, it calls for even more care and specialized tools, especially if this is your custom katana, you will always want to keep it in good condition. But not everyone knows how to clean a Katana the correct way. So here I share a step-by-step easy guide on how to do it.
A Japanese katana requires regular maintenance cleaning, but it also needs post-use cleaning and oiling. It doesn't take long for the katana blade to get severely dulled if debris, oil, or water accumulates in the saya. Because wood absorbs the oil layer on a katana blade during storage, its saya may need to be replaced after some time.
Your Katana may survive a lifetime with the proper treatment and routine sharpening and sharpening work. If you want to keep your Katana in pristine condition, this article will show you how to clean it properly. Keep reading to find all the specialized equipment you need and a step-by-step guide on regularly cleaning your Katana.
Table of Content
- Specialized Equipment You Need to Clean a Katana
- 6 Steps to Clean Your Katana
- How often should you clean your katana
- How to clean the saya
Specialized Equipment You Need to Clean a Katana
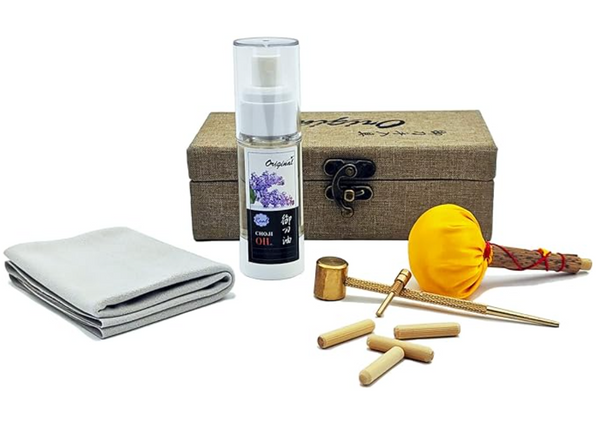
If you own a Katana, you must clean it regularly so it will stay in perfect shape. Of course, that means you will also need to own a Katana maintenance kit. All the specialized equipment you should keep in your Katana maintenance kit includes:
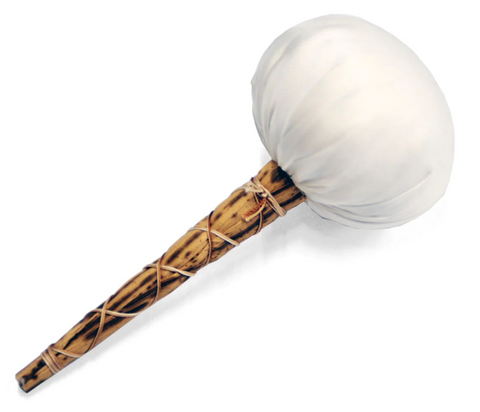
image source
Uchiko, or powder ball, is a little cloth bag that contains fine Katana polishing powder. While it may seem small and unnecessary, it is a must-have item when polishing your Katana.
You can use it to dust the blade with abrasive powder, which will help remove all the grime and minor rust without harming the steel. This powder can also help to remove minor scratches during the polishing stage.
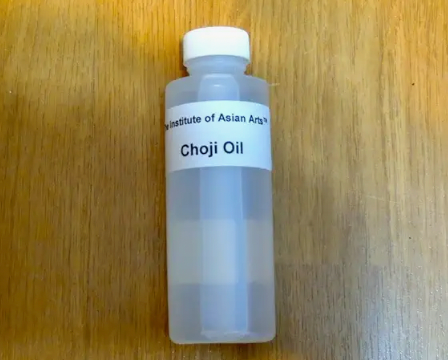
image source
Choji oil, sometimes called clove oil or Choji-abura, is a mineral oil variant with clove extract. After you clean your Katana thoroughly, it is treated with this to add a thin coating of protection against rust and corrosion.
But of course, it may be difficult for you to find this oil. If so, you can skip it and use mineral oil instead.
3. Nuguigami 拭紙 or Wiping Paper
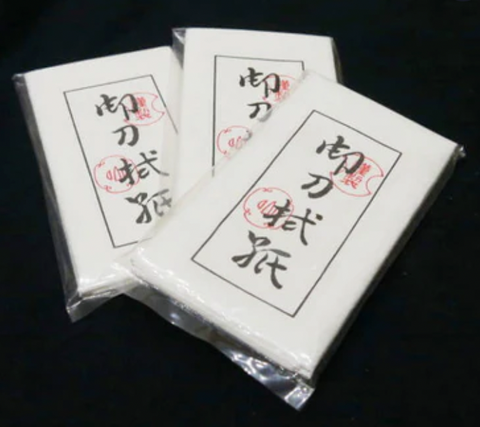
image source
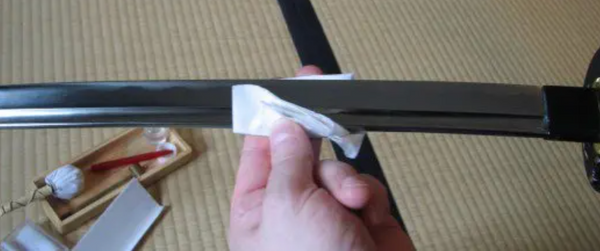
Nuguigami is a cleaning paper for the blade of a sword, typically produced from rice to absorb excess oil and dust. After applying the Uchiko, the blade must be gently wiped down with soft, nonabrasive paper.
Using this paper, you can wipe away any polishing powder or debris on the blade. You could also use soft, lint-free paper napkins or soft pieces of coffee filters.
4. Mekugi-Nuki 目釘抜き or Hilt Peg Remover
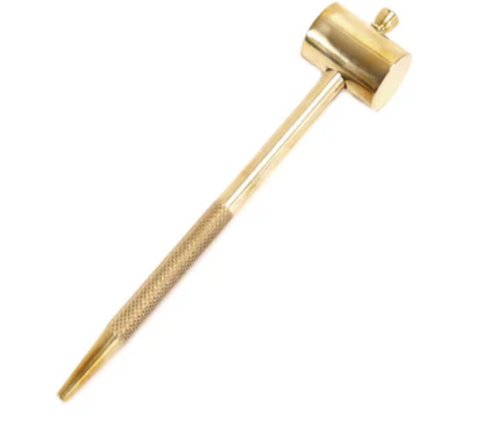
Image source
The Mekugi-Nuki is another essential item when you must disassemble your Katana before you move on to cleaning it. The Mekugi or hilt peg can be removed with minimal damage to the handle by using a Mekugi-Nuki.
This small tool resembles a hammer and helps you perform deep cleans on your Katana. If you do not have this hammer, you may substitute a tiny piece of wood or a nail with a flat head.
6 Steps to Clean Your Katana
Cleaning a Katana can be difficult for those who don't know the proper methods. However, this straightforward step-by-step guide should help you through the process effortlessly!
However, remember to focus on what you're doing the whole time. A live blade can easily cause a severe injury. Here are 6 easy steps to cleaning your katana:
Step 1: Prepare Your Specialized Katana Cleaning Equipment
Prepare your workspace such that everything you need is within easy reach of a single hand. It would be best if you didn't put the Katana down until you're done cleaning it.
Putting the Katana down may take up hair, dust, etc., while you're working on other parts of the process. Put some Choji oil on the oiling rag.
Step 2: Remove Your Katana From the Saya

Draw your Katana carefully from the Saya. Keep the blade facing upward, and the point tilted slightly upward.
*You should either hold the katana during the process, or place it in a soft, dust free cloth, this helps prevent damage the blade.
To clean the saya after removing the blade, gently tap the Koiguchi or mouth against a table until any debris inside falls out. Leaving any dust or debris inside can be rough on the Katana edge and promote rust.
Step 3: Wipe Away Oil and Dirt
Wipe the blade down with the Nuguigami or the soft cotton cleaning cloth to remove the old oil and any dust that may have accumulated. Throw this paper away after a single use. You may pinch the Nuguigami to clean the Bo-hi or groove on the side of the blade.
Remember that the blade's sharp edge should always be facing away from you when you wipe it. Therefore always put your hands on the non-sharp edge of the blade and clean from the tsuba to the Kissaki.
Step 4: Tap Powder On to the Blade
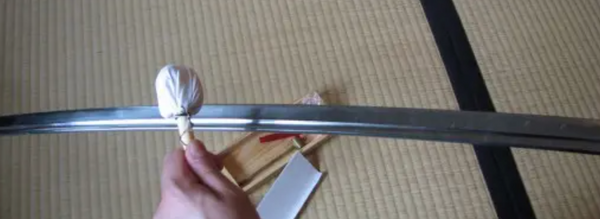
Use the Uchiko ball to lightly tap the blade's non-sharp back edge every 2 to 4 centimeters (about 1 to 2 inches) along its length. With another piece of cotton rag or a fresh sheet of Nuguigami, gently rub the powder into both sides of the blade.
This step helps to remove dirt and grime from the Katana and buffs out any oil smudges. If there are any remaining oil spots or scratch marks, repeat this process. After the powder has been spread evenly over the top and sides, wipe it off with a clean cloth or a piece of Nuguigami.
Step 5: Applying Oil
Take an oiling cloth and apply a few drops of Choji oil or mineral oil on the blade. Make sure the blade's edge is facing away from you, like in the previous steps, and then run the cloth along it. You can repeat this process until a thin film of oil covers the blade.
However, make sure not to apply too much oil. Using too much in the area around the Habaki or blade collar might lead to a clogged blade.
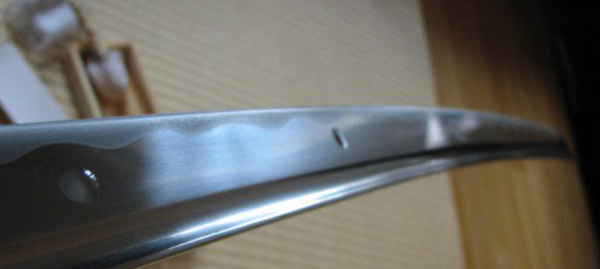
Step 6: Final Check
As a last step, ensure no dry places exist. You can sheath your Katana again when you are certain that the blade is dry and well-oiled.
Now all that's left is to return your Katana to its appropriate place. You can keep the oiling cloth from Step 5 in a Tupperware or other airtight container until the next time you need it.
Tips:
* Don't touch the blade after you have finishing cleaning.
* If you disassembled the katana, make sure every part is dry before you assemble it again.
* Place your katana with edge upward, this way the extra oil will not stack up in the bottom of the saya.
How often should you clean your katana
How often you clean your Katana is largely depends on how often you use the katana, your geographical location and the climate. Generally, it’s advisable to carry out basic maintenance and oiling of your Katana every 1-3 months. However, if you live in a humid climate, you might need to clean it more often, possibly even weekly. It’s also recommended to clean your katana after each use. If your blade has been recently polished, it’s more susceptible to rust, hence, it’s preferable to clean and oil it every ten days for approximately six months. Once the polished blade surface becomes more stable, you should continue to clean it regularly, but at least twice a year.
How to clean the saya
Use a dry soft cloth to wipe the outside of the saya.
If the saya is made of waxed wood, then in regular maintenance, you should occasionally wax it to prevent cracking.
When cleaning the inside of the saya, use a long thin steel bar, wrapped in fine cotton cloth, to carefully clean the inside.
Conclusion
Have you recently taken up the hobby of buying beautiful Katanas? Now that you own a very special Katana, you must also clean it regularly. So for any clueless Katana owners wondering "how to clean a Katana," I bring you easy step-by-step guides to walk you through the process.
I hope this guide has helped to provide you with the proper guidance. Thanks for reading till now.


